You baby has been busy exploring the world around him for some time now. Since the moment he could open his eyes and take his first breath, he was taking in everything through his senses.
From seeing and hearing to feeling and tasting, they are loving the new experiences that they are encountering on a daily basis. However, we need to make sure that we are exposing them to enough of these sensations.
Your baby is getting plenty of sensory learning and exposure in his day-to-day routine. From the hard floor or soft rug that they’re crawling on to the soft bristles while you brush their hair or teeth, they’re experiencing so many new sensations.
There are plenty of ways that we can give them more opportunities to touch and feel new things. One of those ways is to create sensory or busy boards!

What are sensory boards?
Sensory boards, also called busy boards, are a fun way for your baby or toddler to feel so many new textures and objects all in one place. You can put many different household objects or toys on the board for them to touch and feel.
The great thing about sensory boards is that it will keep your baby or toddler busy, and in one spot, for awhile! Since there are a variety of items to explore, they shouldn’t lose attention that quickly.
Creating a sensory board also helps to ensure that the items stay in place on the board, limiting the risk of your baby or toddler sticking things in their mouth. However, you still want to maintain close supervision if there are objects that could be a choking hazard.
How do I make them?
Sensory boards for babies and toddlers can be made using your choice of board, adhesive, and objects. There are literally hundreds of options for items that you can use to make a sensory board.
Just paste, glue, or tape any items that you wish onto a board that will hold strong enough. Then place it in front of your child and watch them be amazed at all the new sights and textures.
For your board, you can use large pieces of posterboard, oak tag, cardboard, wood, plywood, or felt. This is dependent on how heavy the objects are that you are putting on.
Adhesive can be determined by the size and weight of the items. You can use Elmer’s glue, hot glue, Krazy glue, craft adhesive, or Gorilla glue. However, I would use the strongest adhesive you have so your baby doesn’t rip them off in excitement.
There are tons of different items to use when making your board, as well. From household items to toys, the options are endless as long as they fit on the board!
You can choose to have a theme for your board, such as all things soft, all things red, all things squishy, or all things that make noise. You can also just have a very random distribution of items.
If you love Glitter Sensory Bottles too, check out my tutorial on how to make those here!
Examples and Ideas for Sensory Board Items
Here are a bunch of great ideas on how to make your own sensory boards at home. A bunch of the materials you can find around your house, the Dollar Store, or local craft or home improvement store.
Once your baby gets bored of some of the items, you can just switch those out for a few new ones. No need to make a whole new board! Get creative and see how much fun your baby can have with these!
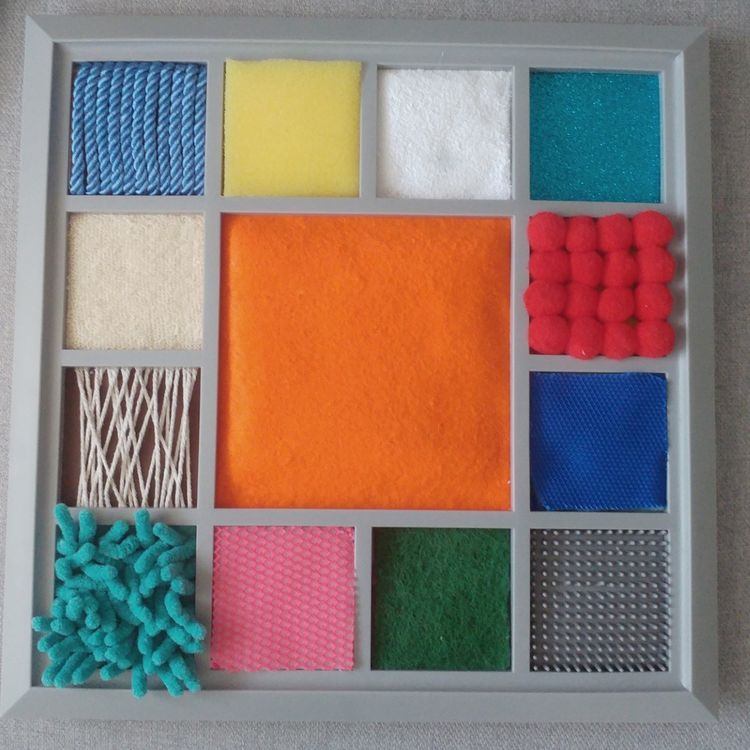
Colorful Textures on Plywood or Cardboard
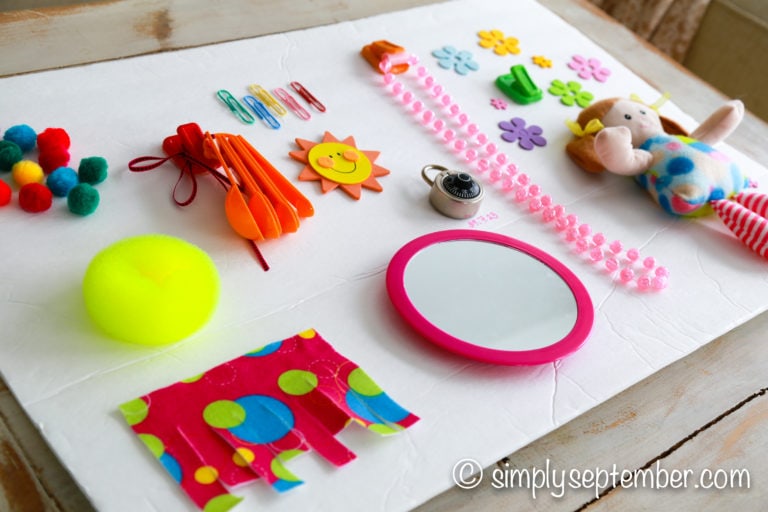
This fun sensory board includes:
- pompoms
- squishy ball
- measuring spoons
- paper clips
- mirror
- beaded necklace
- doll
- lock
- cut up paper
- foam stickers
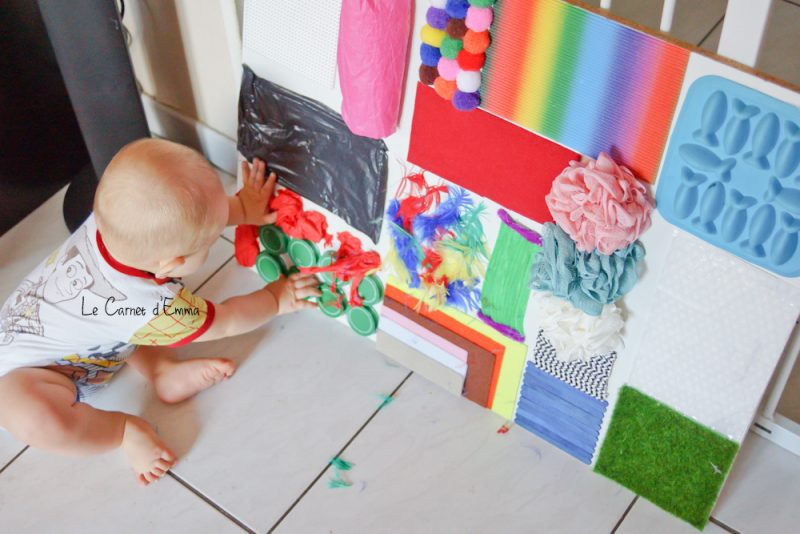
This plywood board sensory board uses:
- Feathers
- Bath loofas
- Tissue paper
- Felt
- Pompoms
- Garbage bag
- Popsicle sticks
- Pipe cleaners
Related Post: How to Make Glitter Sensory Bottles
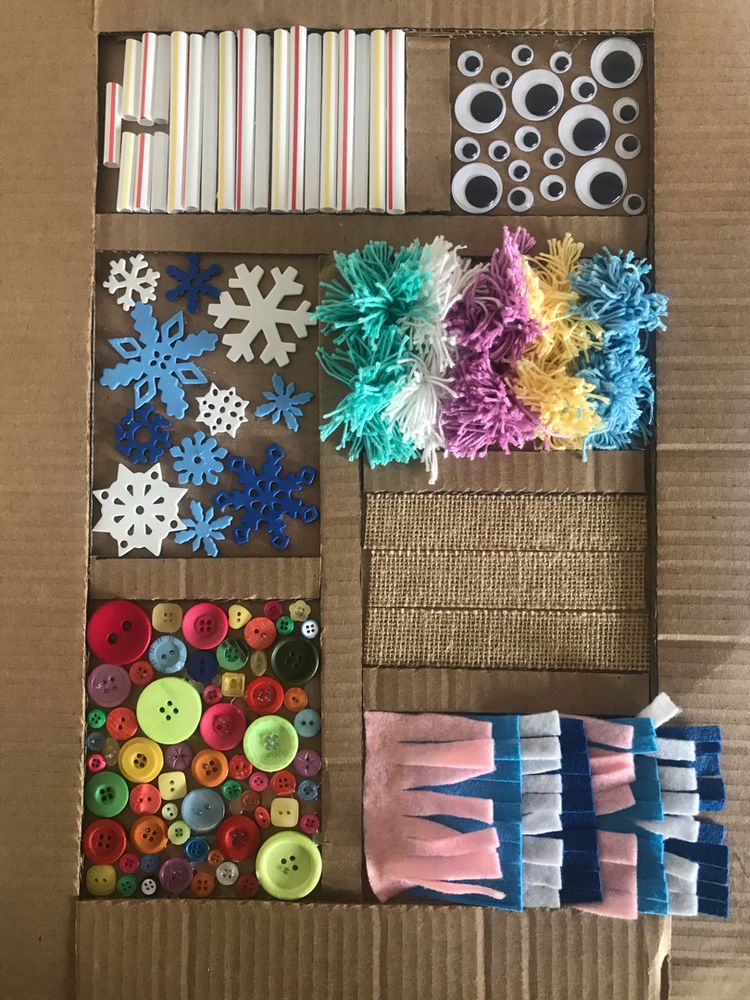
This DIY sensory board included:
- felt
- buttons
- fabric in different textures
- googly eyes
- straws
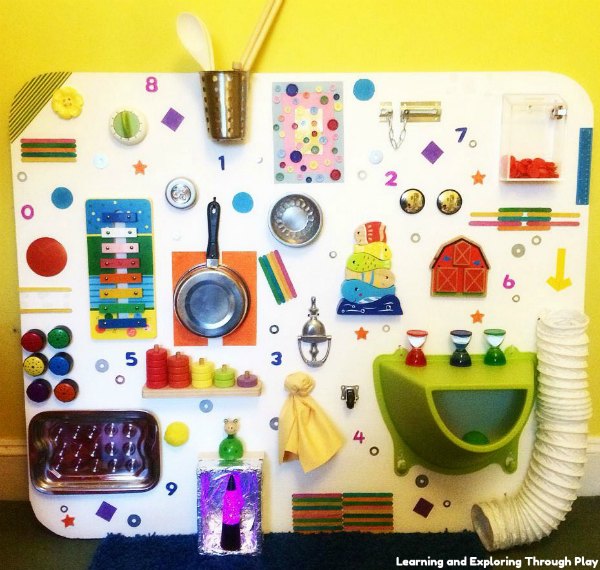
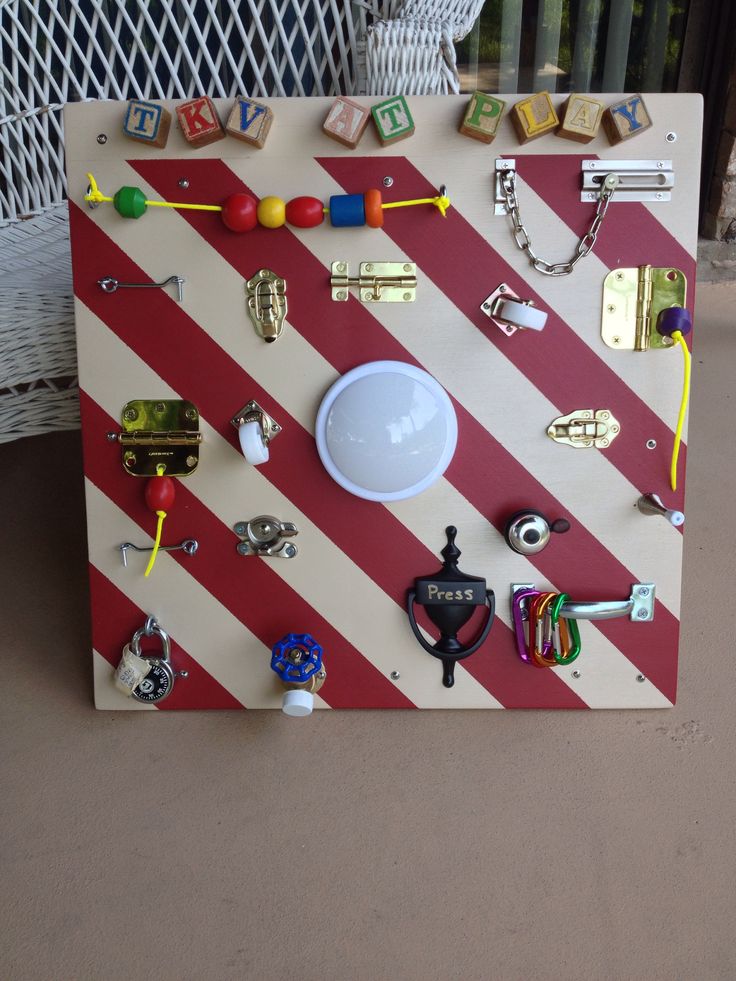
This is quite an extensive board with plenty of areas for fun and exploration, including:
- popsicle sticks
- door knocker
- xylephone
- drop rings
- lava lamp
- barn doors
- chain lock
- buttons
- spoon holder
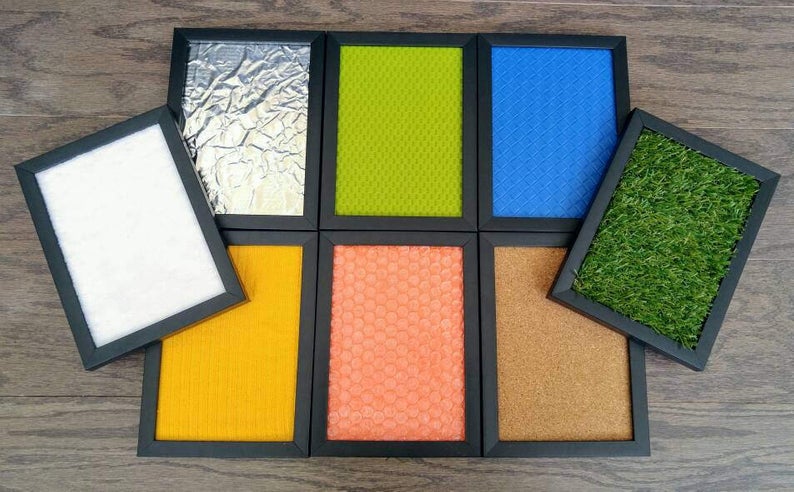
Using Frames and Fabrics

Use cheap frames (10 pack) for many different textures of fabric or sheets. This is a great way to repurpose some old clothing or linens that you don’t use anymore. Just cut them up and let your baby touch and feel!
Try lace, silk, linen, velvet, jersey, cotton, etc. Also, different types of sheets of paper would fit great in frames like matte, glossy, glittery, coarse, tissue, Kraft, foil, plastic, etc.
Individual pieces to make up one board
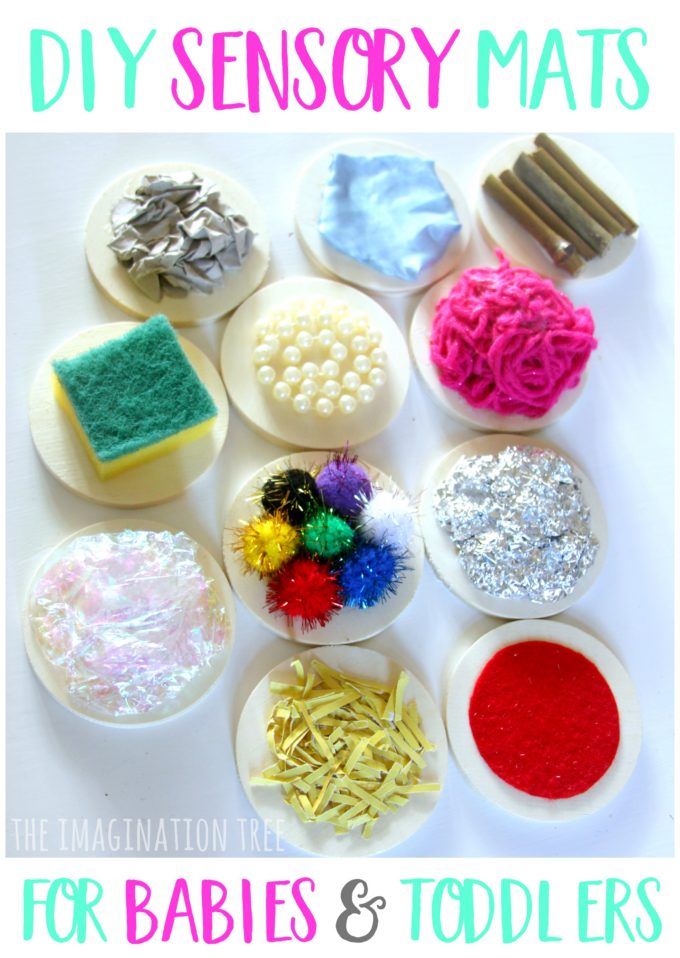
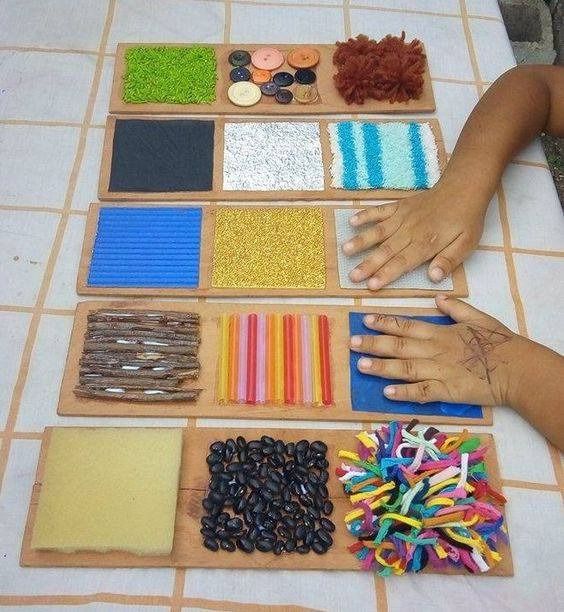
This is a sensory board that’s broke up into sections. This one uses:
- Cinnamon sticks
- Pompoms
- Crumpled paper
- Sponge
- Pearls
- Yarn
- Shredded paper
- Tin foil
- Cellophane
The materials sit atop coasters.
Using a variety of colors and textures
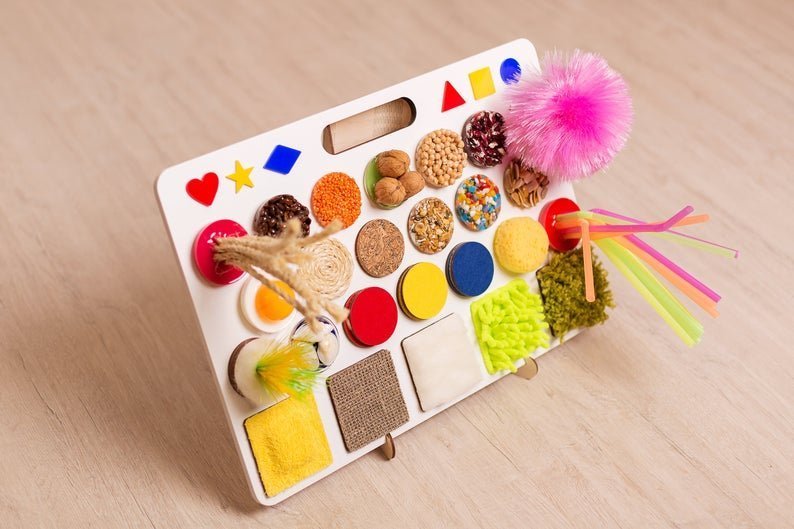
This board is on a stand and shows a variety of materials, such as:
- rope
- beans
- nuts
- poofs
- pebbles
- carpet
- microfiber cloths
- burlap.
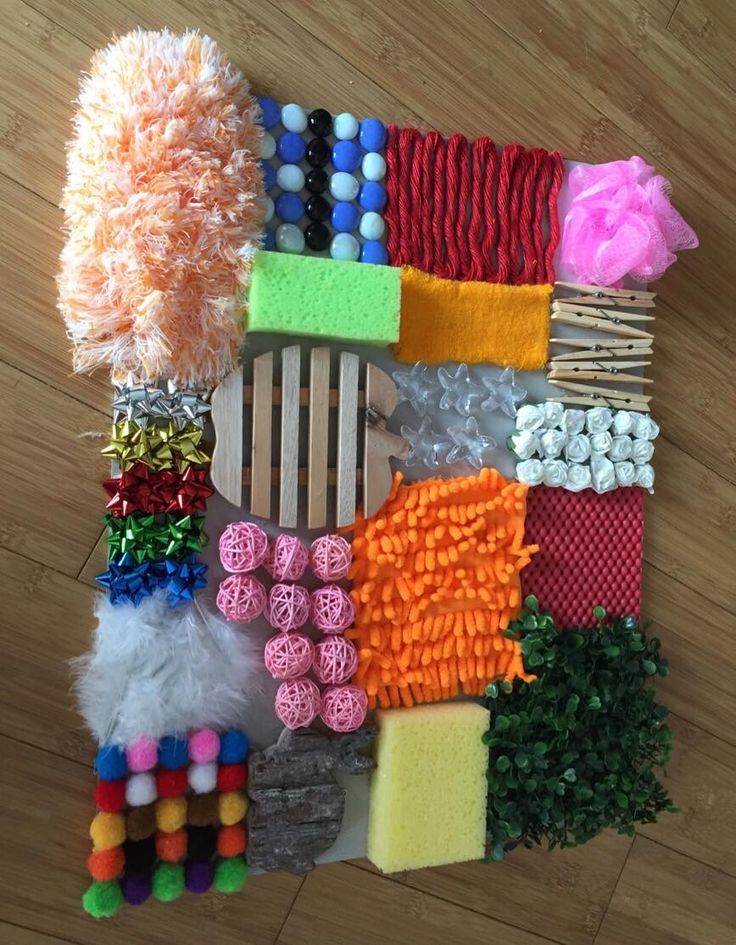
- Bows
- Pompoms
- Rug
- Sponge
- Clothespins
- Yarn
- Bath poof
- Pebbles
- Dycum
This DIY sensory board uses lots of different textures of fabric, as well as other items, including pom toms, q-tips, and sponges.
The following items were glued onto pieces of wood:
- Beans
- Straws
- Sponge
- Hair elastics
- Sticks
- Rug
- Buttons
- Glitter paper
- Textured paper
- Textured cardboard
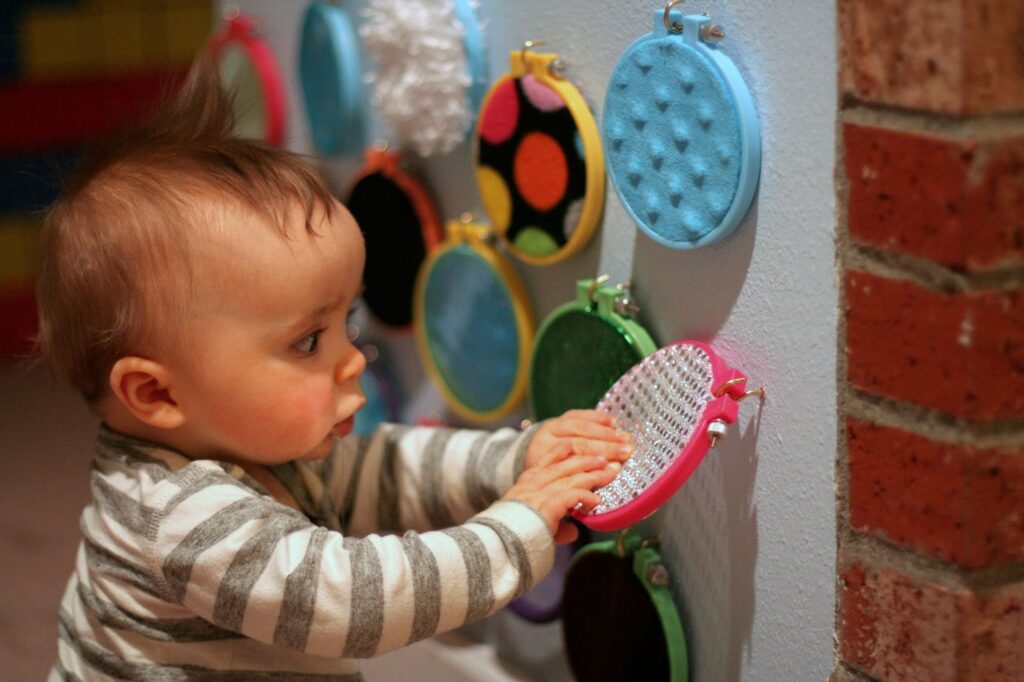
This sensory board incorporates various fabric textures into plastic embroidery hoops for so much added fun for your little ones. Check out her full tutorial on how to make this board here.
Home hardware
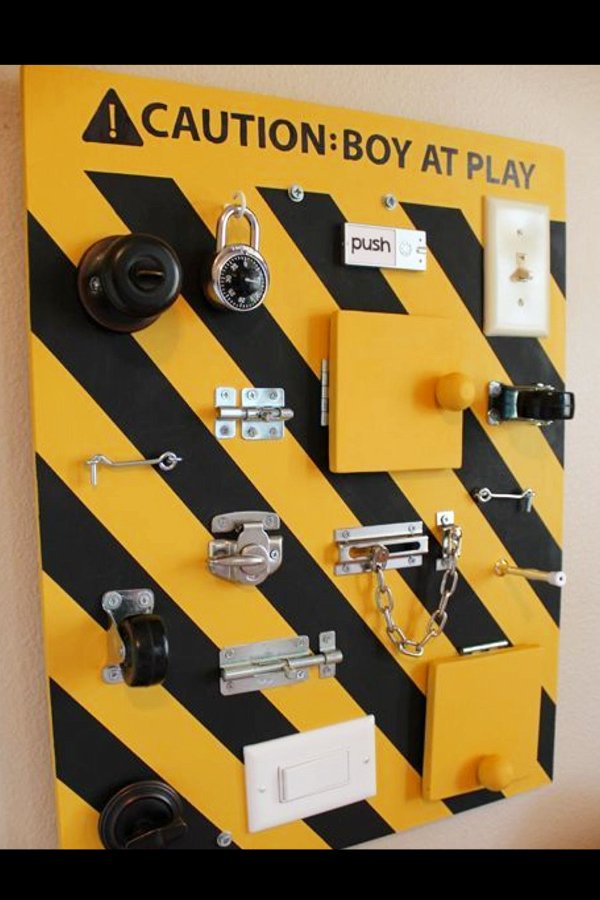
This was a cute way to paint this sensory board as a construction zone with yellow and black. They used plenty of items found in a home hardware store, such as:
- light switch
- door knobs
- door locks
- sliding door locks
- dial lock
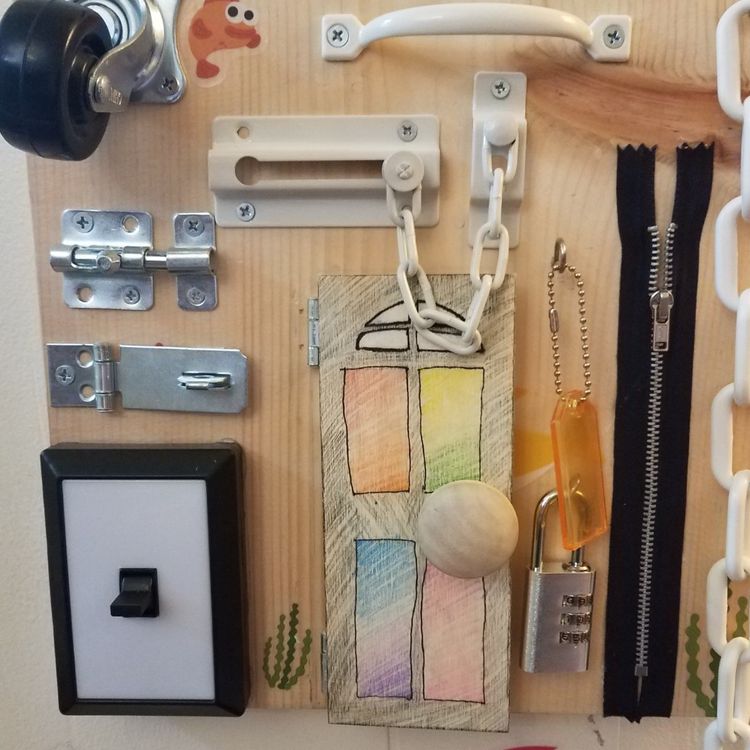
This is an awesome hardware board that uses a variety of locks, fasteners, handles, and switches.
See what you can gather from a home improvement store for your board! Toddlers will love unlocking chains and locks like in their own house.
These are also great for a toddler’s fine motor skills to practice using these items.
- Door knocker
- Faucet
- Handles
- Hinges
- Door locks
- Bolts
- Door chains
- Touch light
- Small wheel
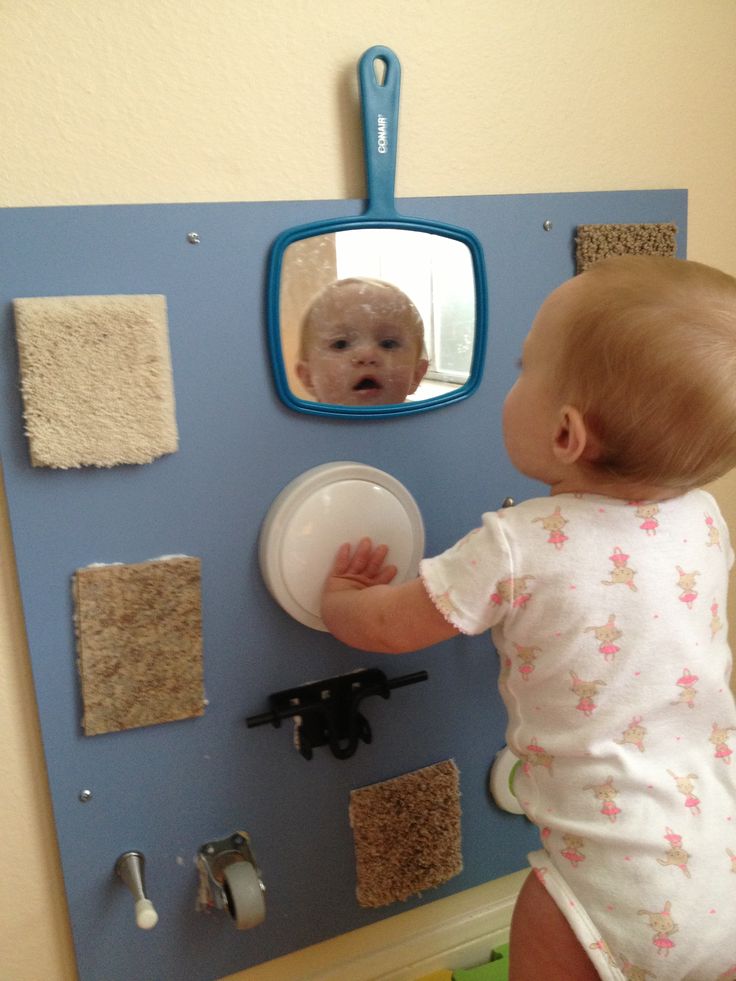
- Mirror
- Small wheel
- Door stopper
- Rug and carpet
- Touch light
What’s behind door #1?
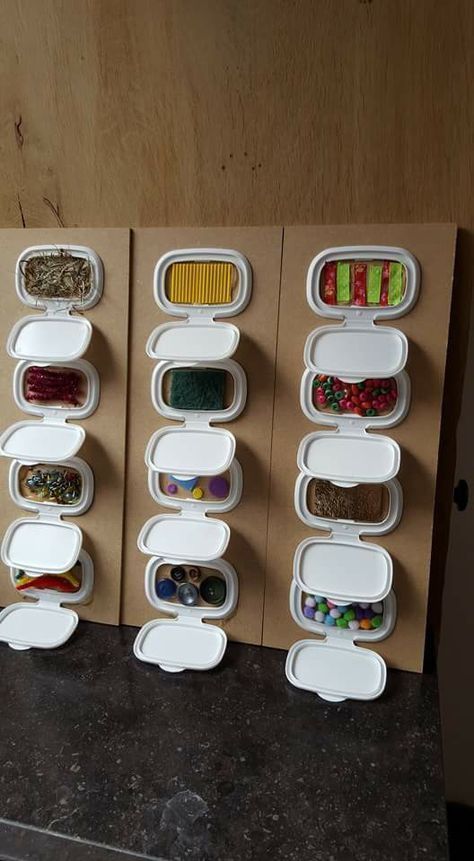
This is a neat idea to put the wipes container lids on your board. It adds another element of surprise when your child is able to open and close each window.
Behind each window are:
- Buttons
- Pompoms
- Sponge
- Shredded paper
- Beads
- Licorice
- Pebbles
- Strips of fabric
A Little Bit of Everything

This sensory board was painted rainbow colors with acrylic paints. They’ve included a ton of different items from the home which would keep a child busy for awhile!
- toilet paper roll holder
- touch light
- wheel
- calculator
- remote control
- handle
- door jam
- light switch
- locks
- key ring
- hooks

These small boards are perfect for the youngest sensory seekers and can be made using small frames with the glass removed and using your favorite materials.
- Piece of sod or turf
- felt
- pipe cleaners
I hope you have fun making a sensory board from your baby or toddler! Let us know what you used in the comments below!

Marissa is a pediatric Occupational Therapist and mom of three children. She started this website to help moms, teachers, homeschool parents, and therapists find resources and ideas to teach their young children and students through play-based learning.